
Spotter
A 4.3-inch touchscreen for the cockpit. Standalone clock when you are off the grid, full rig dashboard the moment it sees home WiFi, and a quiet ear for the alarms that matter while you drive.
What's Inside / Inside Your Rig
The Cockpit Display
Mounted right next to the driver's seat and built to stay there. A glance shows you the date and time, the battery state, the solar coming in, and the alarm list. Designed for driving first: large numbers, calm colors, only the information you can actually use behind the wheel.
Built on the Waveshare ESP32-S3-Touch-LCD-4.3C with the optional plastic case. A single off-the-shelf board carries the display, the touch panel, WiFi, a real-time clock, USB-C power, and a microSD slot. No custom PCB, no soldering. A 3D-printable adapter screws to the two M4 holes on the back and accepts any standard GoPro arm mount, so the screen can clamp to a dashboard rail, a window mount, or anywhere a GoPro will go.
Three Modes, One Screen
It earns its dash space whether you are linked to the rig or not.
Standalone Clock
Out of WiFi range, Spotter shows the date and time, day of week, and the last set of readings it had before the link dropped, with a timestamp. The on-board RTC keeps time across power cycles, so a screen that was set once stays set, even sitting unplugged in the cockpit overnight.
Linked Dashboard
The moment the rig's WiFi is in range, the screen switches itself to a live dashboard: battery state of charge, voltage, solar wattage in, power being consumed, time remaining at the current draw, and the charge mode (bulk, absorption, float). No button. No menu. Pull up to hitch and the clock becomes the dashboard on its own.
Driving Alarms
Spotter listens for events from the rest of the system and raises an alarm right on the screen when one fires. A cabinet door popping open mid-trip via Picket, a fridge that lost power, a hitch sensor that stopped reporting. Which events alarm is configured on the Alarms tab, so an open roof vent on a sunny day does not interrupt you, but a cabinet door swinging open at speed does.
Bill of Materials
One off-the-shelf display, a USB-C power supply, and an optional mount adapter. That is it.
| Qty | Part | Description | Source |
|---|---|---|---|
| 1 | Waveshare ESP32-S3-Touch-LCD-4.3C (with case) | All-in-one ESP32-S3 board with a 4.3-inch 800×480 IPS five-point capacitive touch display, 16 MB flash, 8 MB PSRAM, WiFi 2.4 GHz, BLE 5, on-board RTC, microSD slot, and USB-C, finished in a slim plastic case (116×79×18 mm). The SKU 33630 BOX variant ships ready to mount, no enclosure work needed. | Waveshare |
| 1 | USB-C Power Supply | Any 5 V USB-C power adapter. The cockpit usually has one already, either a 12 V to USB-C socket in the dash or a wall brick at the bench. Spotter draws under 2 A peak with the backlight up. | Any USB-C source |
| 1 | CR927 Coin Cell (RTC Battery) | 3 V lithium coin cell that powers the on-board real-time clock when the screen is unplugged, so the date and time stay set across power cycles and the standalone clock face always reads correctly. Drop one in the holder on the side of the board and forget about it for years. | Amazon (10-pack) |
| 1 | GoPro Mount Adapter (optional) | 3D printed. Screws to the two M4 mounting holes on the back of the case (75 mm apart) and presents the standard GoPro three-prong interface, so the screen accepts any GoPro arm, suction cup, RAM-style mount, or dash clamp on the market. | 3D printed, STL below |
| 2 | M4 Machine Screws (optional, for mount) | M4 screws to attach the GoPro adapter to the back of the Waveshare case. 75 mm hole spacing. Length depends on adapter thickness; 8 to 10 mm typical. | Hardware store |
| 1 | GoPro-Style Arm Mount (optional) | Any standard GoPro arm or suction mount. The mount we run is a generic suction-cup arm with a quarter turn lock, available on Amazon. Anything that fits a GoPro three-prong attaches. | Amazon |
Dimensions
Outline drawing for the BOX variant. Plan your mount before you buy a screen.
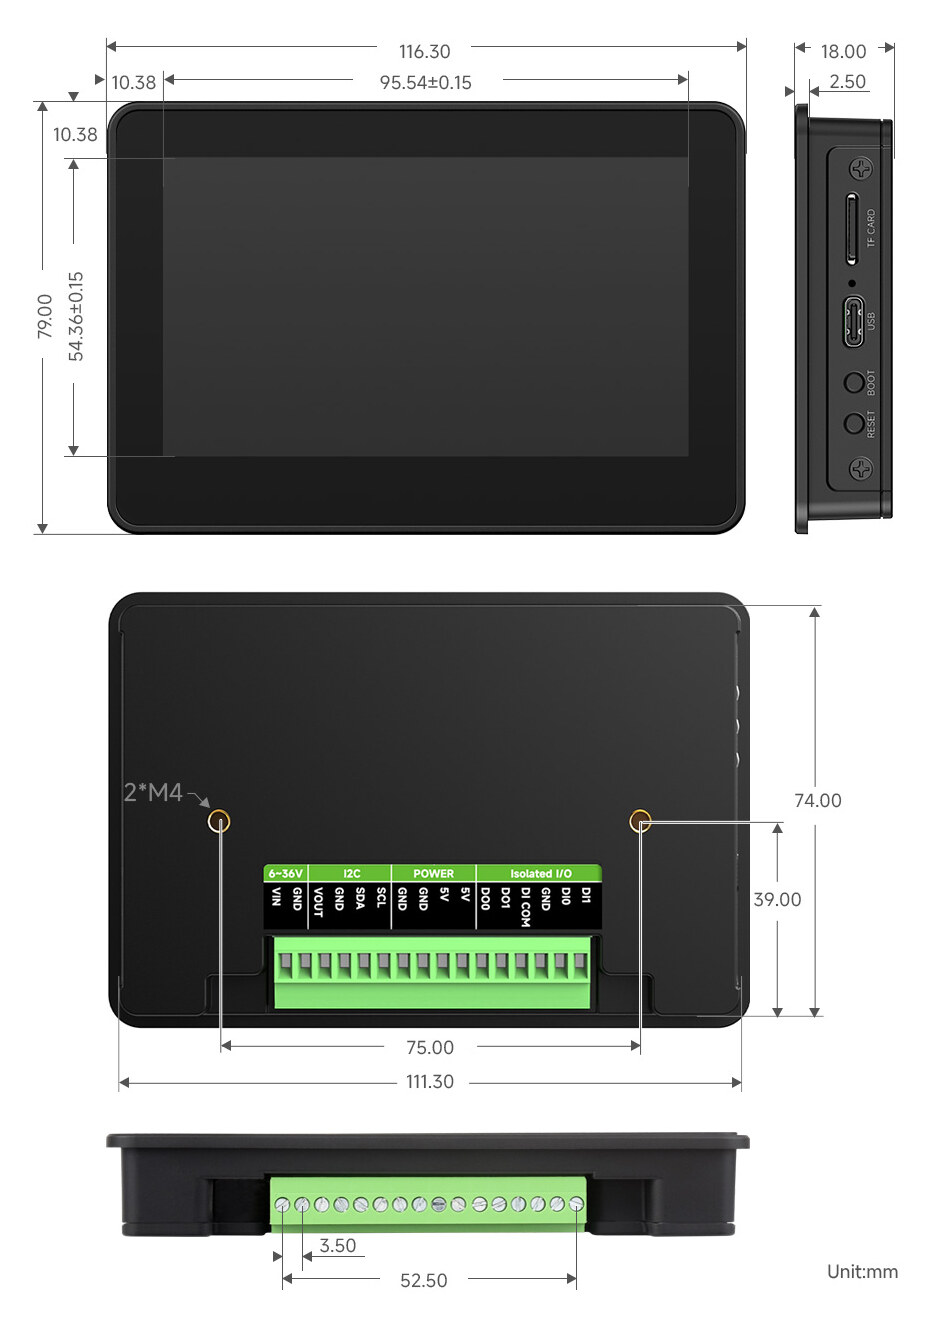
With Case (SKU 33630, what we use)
Overall 116.3 × 79.0 × 18.0 mm. Display window 95.5 × 54.4 mm. Two M4 threaded mounts on the back, 75 mm apart, 39 mm from the bottom edge. USB-C and microSD slot on the right side. The 12-pin terminal block on the bottom is unused by Spotter; we power via USB-C.
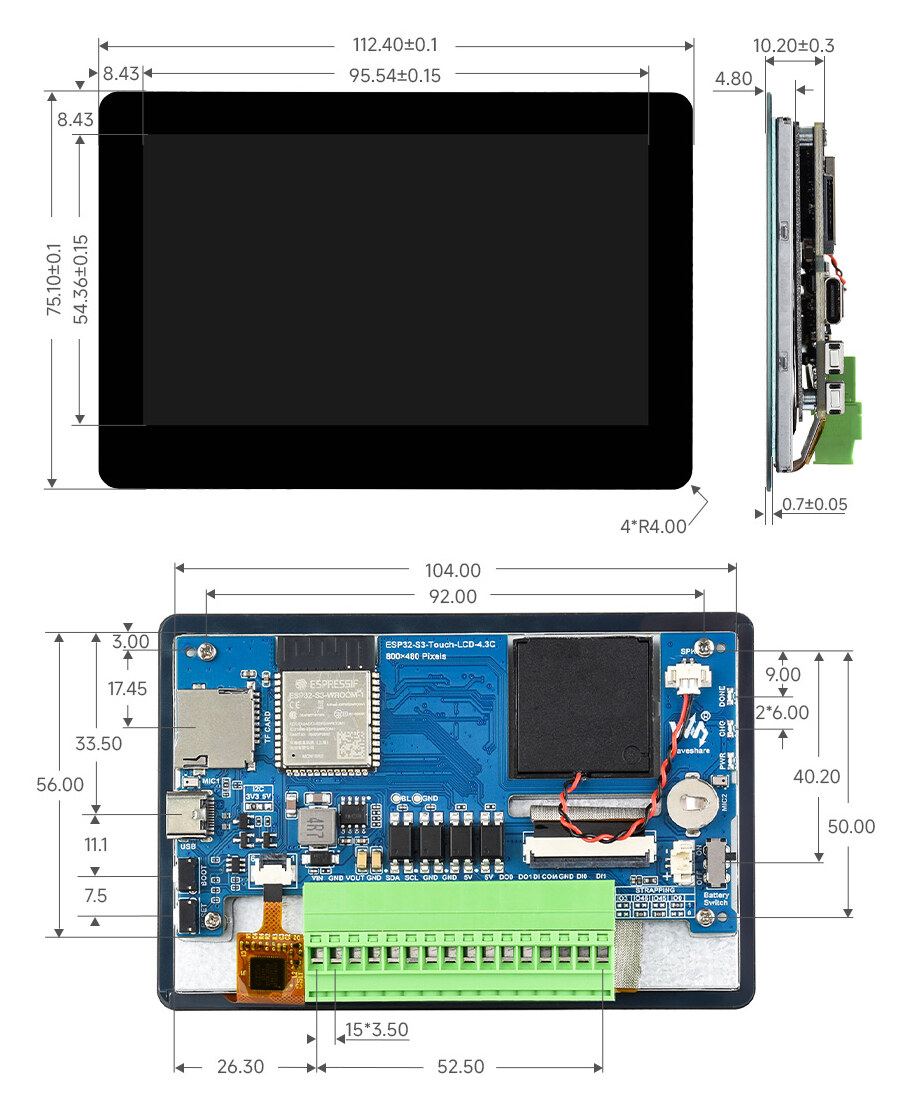
Bare Board (reference only)
For reference if you choose the bare-board variant: 112.4 × 75.1 × 10.2 mm. Spotter targets the BOX variant above; the bare board is shown so you can scope a custom enclosure if you prefer.
Drawings from the Waveshare product page. All dimensions in millimeters.
3D Printed Mount Adapter
One small printed part bridges the back of the case to the standard GoPro mount system.

GoPro Adapter
A flat plate with two M4 clearance holes on a 75 mm spacing on one side, and the standard GoPro three-prong tab on the other. Screws to the back of the Waveshare case and accepts any GoPro-compatible arm, suction cup, RAM-style ball mount, or dashboard clamp. The recommended Amazon suction arm is in the BOM above; anything with a GoPro three-prong works.
- Material: ASA (exterior-grade, UV stable for the dash)
- Nozzle: 0.4 mm
- Layer height: 0.2 mm
- Walls: 4 perimeters
- Infill: 40% (gyroid)
- Orientation: Adapter face down on the build plate
- Supports: None required
- File:
TrailCurrentSpotterGoProAdapterV1.stl
Why GoPro
Every truck stop, every camping store, every Amazon search has a GoPro mount. Suction cups, dashboard arms, window clamps, ball joints, headrest mounts, handlebar clamps. Pick whatever fits your cockpit. If you change vehicles, the screen comes with you and the new vehicle just needs a different arm.
The adapter is the only piece you print. The screen and arm are off-the-shelf.
Hardware
One off-the-shelf board does everything. No custom PCB, no soldering.
MCU and Display
Waveshare ESP32-S3-Touch-LCD-4.3C-BOX. Dual-core Xtensa LX7 up to 240 MHz, 16 MB flash, 8 MB PSRAM, integrated WiFi 2.4 GHz and BLE 5. The 4.3-inch 800×480 IPS panel with five-point capacitive touch is part of the same assembly. Firmware is flashed once via USB-C using the TrailCurrent Flasher. Subsequent updates land over the air.
Real-Time Clock
An on-board RTC, kept alive between power cycles by a CR927 coin cell (see the BOM), holds the date and time. The clock is set once from Bearing's GPS time over MQTT and then runs on its own, so even with no WiFi and no signal the cockpit always shows the correct time.
Mounting and Power
Two M4 inserts on the back of the case (75 mm apart) bolt to the printed GoPro adapter, which then accepts any GoPro arm or clamp. Power comes in over USB-C from any 5 V source: a 12 V dash socket, a hardwired buck converter, or a wall brick at the bench. Draws under 2 A peak.
How It Works
First-time setup is on-screen. After that it just shows up.
-
1
Print the mount adapter
Open
TrailCurrentSpotterGoProAdapter.3mfin Bambu Studio or Orca, or grab the STL from the CAD folder. ASA, 0.2 mm layers, 4 walls. Print time runs under an hour. -
2
Flash the firmware
On the bench, plug the Waveshare into USB-C and flash with the TrailCurrent Flasher. Future updates arrive over the air once the screen is on the rig's WiFi.
-
3
Walk through setup
First boot lands on a setup wizard right on the screen. Pick the TrailCurrent WiFi network from the list, enter the password, confirm the gateway. Done. Settings save to flash, so the screen comes back to the same network on every power-up.
-
4
Mount it
Two M4 screws hold the printed adapter to the back of the case. Snap the adapter into any GoPro arm or suction cup. Plug in USB-C. The cockpit has a screen.
-
5
Tune the alarms
Tap the Alarms tab and pick which sensor events should interrupt you while driving. Cabinet doors, hitch presence, fridge power. An open roof vent on a sunny day should not alarm; a cabinet door swinging open at speed probably should. Your choices persist across reboots.
-
6
Drive
Out of WiFi range it shows the clock and the last known readings. Back in range it flips to the live dashboard within seconds. If a configured alarm trips along the way, it appears on-screen until you acknowledge it.
On the Roadmap
Two add-ons that turn the cockpit display into a proper driving aid.
Blind Spot Monitoring
Blind spot detection will arrive as its own dedicated TrailCurrent module — sensors mounted toward the back of the rig that report into the system. Spotter is the display side: it lights the blind spot indicators on the Drive screen when something is back there. The indicators are already drawn in the interface; the sensor module is the work in front of us.
Useful where the factory blind spot system either does not exist (older Class A, B, or C, or any travel trailer) or estimates trailer length wrong. Even on a newer rig with factory monitoring, a sensor placed back where the length actually ends sees what the front-of-truck sensor cannot.
Tire Pressure (TPMS)
TPMS will also ship as a separate TrailCurrent module with its own valve-stem or strap sensors and a receiver that publishes onto the rig's MQTT bus. Spotter reads those readings off the bus and renders per-tire pressure on the Drive screen with a user-set target. Numbers go amber if a tire drifts low. A flat is one of the things you really cannot afford to miss on a tow.
Adds value alongside any factory TPMS, because the trailer tires usually are not in the factory list, and the cockpit display puts all of the wheels on one screen no matter how many axles are behind you.
Build Your Own Spotter
One off-the-shelf screen, one printed adapter, any GoPro mount. Firmware, CAD, and protocol details are all in the repository.